

Grass Seeding Series: Pt 2 - Laying Grass Seed on Slope
- Aug 14, 2020
- 6 min read
Updated: Nov 9, 2021

Fact: Growing grass seed (especially on a slope) is a lot easier with these helpful tips!
Welcome back to week 2 of the “Grass Seeding Series” here on Liv Evon Designs, where I cover my husband and I's journey to renovating our lawn with newly seeded grass!
If you haven't already, check out Pt. 1 - Prepare Soil for details on how to prepare your lawn for laying grass seed. Brief recap - we covered how we removed the ivy that completly covered our sloped backyard. If you have a similar issue, pleeease do yourself a favor and checkout how we removed it to clear out the soil to start Pt 2. If you don't have ivy, the principle of clearing out your soil is still IMPORTANT and the general method still holds, so check out the post!
Now that the hardest part is over (pt 1), laying out our grass seed is upon us! Sounds slightly simpler than it really is - it's not just seed involved. Just like when you pot plants or put them into soil, you need to supplement your plant with nutrients and water. Just like you, you need food and water, so does living breathing grass. Note: This project took us 1-2 hours to complete. Now let’s get into it!
Part 2 of Grass Seeding: Laying Grass Seed
When to Lay Seed
It’s best to prepare your soil in either the Spring or Fall, as soil temperatures are usually best for grass to grow and thrive (check back of grass seed bag for exact temperatures). If you don’t seed during the right temperature, you could end up wasting all of your money buying and preparing for seeding for nothing to grow. Please note, it's not so much the season of the year that's important to seed your lawn, it's really the temperature that's the pivotal part, Spring and Fall are just the most reliable times for the temperatures needed for seed. Though do note, Fall is seen as a slightly better season to seed as the Spring is followed by Summer, which can present extreme hot temperatures that can strain/kill young lawns.
Types of Grass Seed
There isn't one type of grass seed for the entire United States. Below is a map of the lawngrass zones of the U.S. which indicates the type of zone each state falls in, which is how grass seed is categorized - certain grass seed grows best in certain areas. Some seed is better in that it's made for more drier, more humid, more shaded, or more moist climates. This map can often be found on the back of grass seed bags, it may not look exactly like this, but very similar. If you don't live in the U.S., please search for a similar map when you begin to shop for grass seed - again, often times it can be found on the back of grass seed bags.

(Map exampling grass zones in U.S., courtesy of Wikipedia)
Typically, grasses are zoned into 3 major groups:
Cools-season Grasses (Cold Winter Humid/Arid Zones, Mild Winter Humid Zone)
Transitional Grasses (Transition Zone)
Warm-season Grasses (Hot Summer Humid/Arid Zones, Semitropical Zone)
We used Tall Fescue grass seed - which is usually a blend of warm- and cool-season grasses, as it's one of the seeds best for those in the Transition Zone in areas of high foot traffice and under full/paritial sun (make sure to consider the level of shade/sun the area you plan to seed gets, as that's important as well). Check out Lowe's for your grass seed type.


Other Materials Used to Lay Seed
Top Soil/Organic Material - Top soil/compost both are both organic nutrient-dense soils that can and should be added to your existing soil right before adding seed, to give the seed and the baby grass to-come food for growth. 😊 We used top soil for this project and it worked wonderfully!
Straw - Helps to maintain moisutre in your soil and seed to ease the watering process.
Note: DO NOT lay fertilizer when seeding, as the fertilizer can BURN your seed, preventing growth. Your topsoil/organic material will serve as your fertilizer for now (they both serve to provide nutrients to your seed/plants. If you are seeding in the Spring, wait to lay fertilizer on your new lawn until the Fall, so your soil is jam-packed with nutrients for when the strong growing season of Spring hits.
How We Laid Seed
Step 1: Add Top Soil/Compost/Orangic Material
Rake it in using a heavy-duty yard rake to spread it out evenly and then use a rototiller to till the two soils together to a roughly 2-3 inch depth in order to mix in and break-up soil so the grass seed can easily grab root to the soil to create its root system.
(Slide for pics)


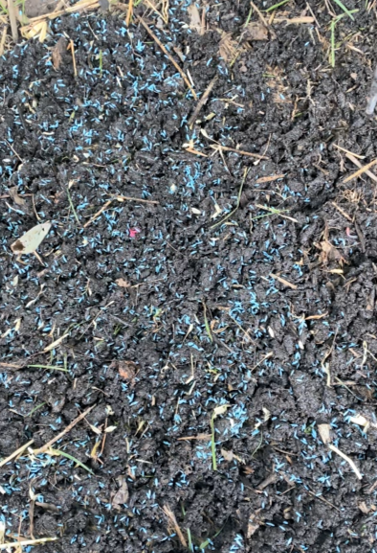
Step 2: Lay Seed
Lay your seed using either your hand and a bucket or a spreader. Because we were seeding a hill/slope, we laid the seed on heavier than most would in order to account for seed washing away with watering/rain and from the birdies who might eat it up. Once the seed is laid, take your heavy-duty garden rake and rake the topsoil w/seed to lightly cover some of the seeds in the soil to a depth of about 1/4-inch - It's okay if some are left on top, this just helps ensure some seeds will be surrounded by soil to begin rooting and growing (pic below).
(Slide through for pics of laying seed:)


Step 3: Lay Straw
Lay straw to help prevent the seed from shifting around and to make it harder for birds to eat your seed. It also helps to retain moisture which makes the watering process a bit less arduous for you. The straw should be laid only enough to lightly cover the ground (pic below) - too much could suffocate your seed/soil inhibiting proper sprouting/grass growth.


Step 3a: Dance and Celebrate! ✨ Your lawn is seeded and now just needs step 4.✨
Step 4: Water daily
Water daily until germination occurs (usually between 6-14 days), you never want your seed to dry!!! Water daily to maintain moist soil/seed until your seed has germinated (grass has begun to sprout) - be sure not to overwater (no large puddles of water, just enough to ensure it's moist), touch the soil with your hands to ensure it's moist and not dried out. Then from there continue to water daily for the next 2-3 weeks, your grass does not need to be constantly moist at this point. You just want to make sure your grass gets watered on a regular schedule just like any other plant. We water about 3 times per day (morning, afternoon, evening) because that's how often our soil would start to dry. Use your own detective skills to know how often you should water - at least 2 times per day.


Tips:
Avoid foot traffic on the grass during these initial weeks - Sometimes squirrels will get in and dig around (which sucks! *eye roll*), but do your best to replace soil where they displace it (if those areas never grow seed, that's okay, just reseed that area while you are still in the temperature range for seeding.
✨Shop Materials Used (Pt 1 & 2)✨
Scott’s Grass Seed - Tall Fescue Mix - https://amzn.to/2PHvICz
Bow Rake 14-Tine - https://amzn.to/3fLNMGh
Straw Bale - Local garden center
Firm Grip Leather-Palm Large Gloves - https://amzn.to/2XfdCvJ
- Used to protect my hands while doing yard work.
ROYBI ONE+ 18-Volt Cordless String Edger/Trimmer - https://tinyurl.com/uwxrvv7
- Electric powered, so no gas needed!
- Please read the user manual to know how to properly operate and maintain.
Fiskars 10 in. Power-Lever GripEase Hedge Shears - https://tinyurl.com/yxvmwqgh
Ames 48 in. Shovel - https://tinyurl.com/yy8pl4g5
Sun Joe TJ603E 16-Inch 12-Amp Electric Rototiller and Cultivator - https://amzn.to/3jZR5wy
- Electric powered, so no gas needed!
- Please read the user manual to know how to properly operate and maintain.
100 Ft 12 Gauge Lighted Outdoor Extension Cord - https://amzn.to/311mnuB
- Necessary to have either a:
100ft at least 14, 12, or 10 gauge outdoor extension cord, or a
50ft at least 16, 14, 12 or 10 gauge outdoor extension cord for this Sun Joe rototiller.
My electrician mother explained to me that it is important to have a cord that’s strong enough for the job as to not short circuit (or overwork and burn out) the cord/rototiller.
*These links may be affiliate links to products - I may receive a commission for purchases made through these links.
See you next Wednesday for "Grass Seed Pt 3 - Grass Growth."

- Liv Evon


Comments